Share:
Verification on OnlyFans is a mandatory step for anyone planning to earn on the platform. Until your account is verified, you will not be able to accept payments, withdraw funds, or fully use the platform’s monetization features. Verification is required to confirm your age, identity, and compliance with payment system requirements.
Below is a detailed overview of what documents are required, how to photograph them correctly, how the verification process works step by step, the most common reasons for rejection, and what to check before submitting your application to avoid delays or resubmission.
What Is OnlyFans Verification and Why Is It Needed
Verification confirms a creator’s identity using an official photo ID and a selfie. OnlyFans works with banks and payment providers, so it must ensure that every creator is over 18 years old and uses real personal data. Verification also helps protect creators from impersonation, content theft, and fake accounts created under their name.
Without verification, the account remains inactive. You can set up your profile, but you cannot set a subscription price, sell content via messages (PPV), accept tips, or launch paid streams. Even if funds somehow appear in your balance, you will not be able to withdraw them to a card or e-wallet.
Some interaction features may also be unavailable. An unverified account that attempts to bypass platform restrictions is very likely to be blocked.
To pass the verification, you need to meet several basic requirements.
- Age 18+ — checked strictly against the document.
- Possession of a valid state-issued photo ID.
- Use of real name and date of birth.
- Country of residence does not affect verification — OnlyFans supports most countries.
Important: The name and date of birth in the profile must match the document exactly. Even one extra letter or a missing letter often leads to rejection.
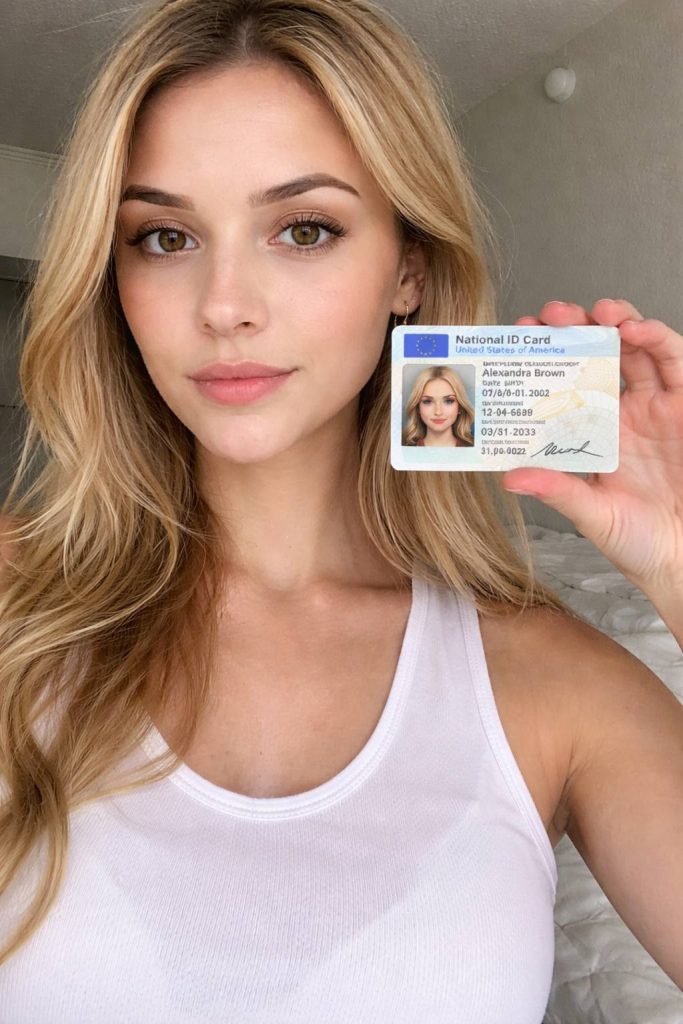
Which Documents OnlyFans Accepts and Which It Doesn’t
OnlyFans only accepts state-issued identity documents. For example:
- Passport,
- National ID card;
- Driver’s license.
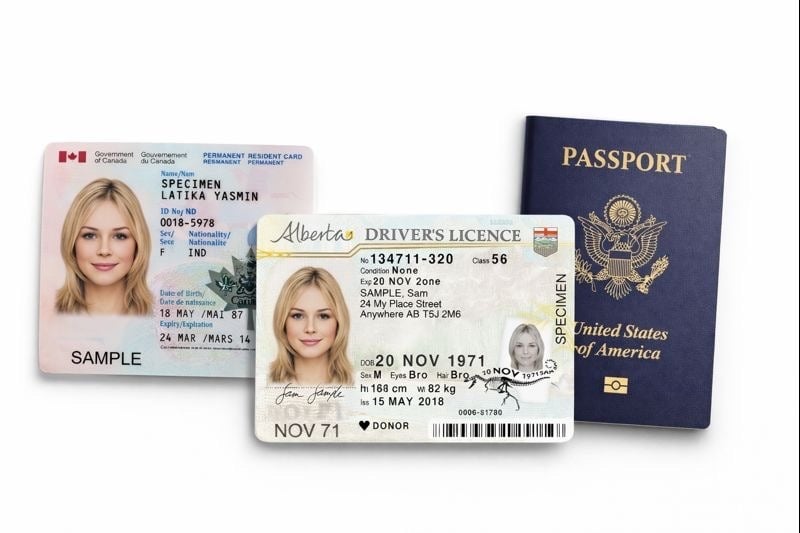
The document must be valid, in good condition, without visible damage. The name, date of birth, and document number must be clearly readable, and the face on the document must be recognizable
Documents that are not accepted:
- Student ID;
- Pass, badge, employee card;
- Birth certificate;
- Bank card;
- Medical and insurance documents;
- Copies without the original document;
- Certificates, statements, or documents without a photo.
Before submitting an application:
- Check the document’s validity. Make sure it has not expired.
- Assess the photo. The photo in the document must be recognizable. If you have changed your appearance drastically (different hair color, plastic surgery), be prepared for additional checks.
- Have a second document on hand. For example, a driver’s license if your main one is a passport. If there are problems with one, you can use another immediately without wasting time.
How to Photograph Documents Correctly to Increase Your Chances of Approval
Photo quality is one of the most important factors in verification approval. It’s best to take photos in daylight near a window. Place the document on a flat surface and keep the phone camera parallel to it. Do not crop the edges, as this can confuse the verification system.
You must not:
- Edit the photo;
- Increase sharpness or contrast;
- Use filters;
- Upload screenshots;
- Upload scanned documents with automatic enhancements.
Step-by-Step Verification Process
Step 1. Complete basic registration. Create an account by entering your email, password, and username. Your username can be anything, but the first and last name you later enter in your profile must be your real legal name.
Confirm your email by following the link in the email from OnlyFans. Check the «Spam» folder if the email hasn’t arrived.
Step 2. Fill out your profile. In your profile settings (Settings > Profile), complete the required field:
- Legal First & Last Name — exactly as in the document, including transliteration.
- Date of birth.
- Country and residential address.
The system will prompt you to upload the required information
Go to the «Become a Creator» or «Verify my Account» section (often located in Settings > Account). This will launch the KYC (Know Your Customer) process.
Step 3. Upload your ID document. Upload a clear photo of your document taken in good lighting, without glare. All text, numbers, and the photo must be clearly visible and readable. You will see on-screen instructions to help you take an acceptable photo.
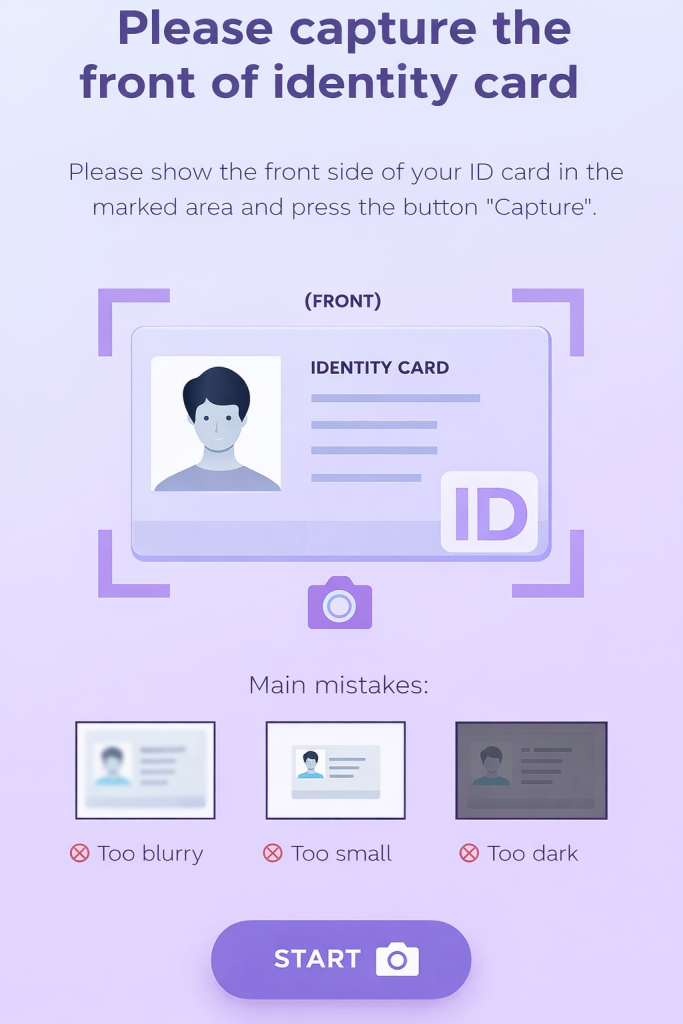
The system will guide you on how to take a good photo
Step 4. Take a selfie with the document. Use the built-in camera inside the OnlyFans interface. Uploading a pre-taken photo often leads to rejection. Hold the document next to your face without covering it. Do not use filters, sunglasses, or hats (except religious headwear that does not cover the face). Look directly at the camera with a neutral expression.
Example of a good selfie
Step 5. Provide additional information (if requested). Depending on your country or account status, OnlyFans may request:
- Address Proof. A utility bill, bank statement (not older than 3 months) with your name and that address.
- Links to Social Media. Required very rarely, mainly for public figures or if questions arise. OnlyFans check that you are a real person, not a bot.
Step 6. Submit and wait. After completing all fields and uploading your documents and selfie, click Submit. The result will be sent to your registration email. Verification usually takes between 12 and 72 hours, and often less than 24 hours.
Reasons for OnlyFans Verification Rejection and How to Fix Them
Verification rejection is a common situation, especially on the first submission. In most cases, the problem is not with the document itself, but in the details: photo quality, data mismatch, or formal violations. Below are the main reasons OnlyFans rejects applications:
Poor photo quality. The most common reason for rejection. For example, if the photo is blurry or taken while moving; glare from a lamp covers part of the text; the document is photographed at an angle, distorting some information; the uploaded photo is low resolution. It’s better to retake the photo in daylight, placing it on a flat surface.
Cropped edges. If only the spread without edges is in the frame or part of the document goes beyond the frame — verification may be denied. Better to take a new photo so that the passport or ID card fits completely in the frame.
Name or date of birth mismatch. Even minimal discrepancies lead to rejection. For example, a shortened name instead of the full one; an extra letter or missing space; a different day and month of birth. If the passport says Judith Anne Thompson, and the profile says Judy Thompson — that is enough for rejection. Therefore, double-check every letter and number in your profile before submitting.
Expired or invalid document. OnlyFans may deny verification if the document has expired, or needs to be replaced due to age. Better to use another type of ID.
Problems with the selfie. The selfie is checked automatically and manually. Common reasons for rejection: face covered by hair, glasses, or a mask; the document blocks part of the face or text; filters or editing were used. We advise retaking the selfie in good lighting, holding the document next to your face.
Signs of image editing. Any editing can lead to rejection. Filters, sharpening, changing brightness and contrast. We advise using original, unedited photos.
Suspicion of using someone else’s document. For example, if the face in the selfie does not match the photo in the document; there is a noticeable age difference; gender or external characteristics do not match. In such cases, they may not just reject the application but also freeze the account without the possibility of re-submission.
Lack of factors confirming identity. Sometimes the system requests additional data, especially if you have a completely empty profile, no connected social networks, or suspicious activity is detected immediately after registration.
What to Do If You Create Collaborative Content
If someone else appears in your content — a partner, friend, or model, even occasionally — your verification alone is not sufficient.
For this, a release form is used — a consent form where the second person confirms their age and gives permission for the content to be used. In some cases, the platform also requests the second participant’s document and their selfie.
Important: Accounts are often blocked even after approved verification if a person without a verified account appears in the content. This is one of the most common reasons for freezing accounts with money in the balance. If you plan collaborative content, it’s better to sort this out in advance, not after the first complaint or manual check.
What Happens After Successful Verification
The account receives Creator status, but this is not the final step. Verification confirms your identity and age, but to actually withdraw funds, you need to go through another mandatory step — filling out payment and tax information.
OnlyFans will prompt you to fill out a tax form. For users from the USA, this is form W-9; for users from other countries — W-8BEN. The form requires your real data: name, country of tax residency, and confirmation that you are not a US tax resident. Without a correctly filled out form, fund withdrawal will be unavailable, even if there are already funds in the balance.
After this, you need to choose a payment method: bank account or a supported payment service. Until this step is completed, money may be credited to the internal balance, but it will be impossible to withdraw it. Therefore, it’s important to understand: approved verification is access to monetization, not an automatic ability to get money.
Recommended Order of Actions After Successful Verification:
- Check your email and the interface — make sure the status is «Verified» or «Approved».
- Set a price for the monthly subscription (Settings → Subscription Price).
- Fill out the tax form (Settings → Tax forms). Without this, fund withdrawal is impossible.
- Set up the payment method (Settings → Payments). Enter the exact details to avoid returns.
- Set up content and prices: create the first paid messages (PPV), set a price for viewing the wall (if used), set up tips.
- Check privacy and security settings (two-factor authentication).
Reasons for Verification Rejection and How to Fix Them
If you received one rejection — that’s normal. If the situation repeats — carefully read the email from OnlyFans. Even if the wording is general, it almost always contains the key reason for rejection: photo, data, selfie, or document. Fix exactly that, not everything at once.
It also makes sense to change the document. For example, if a passport raises questions, use an international passport or driver’s license. This often solves the problem faster than trying to improve the same photo.
If you still get rejections after several attempts, you can write to OnlyFans support via the official support, briefly describing the situation and clarifying which specific point is preventing verification from passing. Write calmly and to the point, without emotions and unnecessary explanations.
Most Popular Questions (FAQ) on OnlyFans Verification
1. How many times can you submit a verification application if you get rejected?
The number of attempts is not limited. With each rejection, you receive an email with the approximate reason. Correct the indicated error (for example, retake the photo) and submit the application again. It is important not to make the same mistakes again — this may lead to the account being frozen for manual review.
2. How long should I wait for a response? The check has been pending for a week already — is this normal?
The standard period is from 12 hours to 3 business days. If the verification lasts more than 7-10 days, check the “Spam” folder in your email or write to official OnlyFans support via the form on the website, politely indicating your username and the date you submitted the application.
3. Is it possible to pass verification with a driver’s license?
Yes, this is one of the main documents used to pass verification.
4. What to do if I changed my surname or my appearance changed significantly?
You need to go through verification with your new document. In your profile, specify the current first and last name.
Be prepared that support may request additional confirmation (for example, a marriage certificate). As for a change in image — if you are still recognizable in the old photo in your passport — there should be no problems. If your appearance has changed drastically (for example, transgender transition), it’s better to contact support in advance for instructions to avoid multiple rejections.
5. Do I need to fill out the tax form (W-9/W-8BEN) immediately after verification?
Yes, it is highly recommended to do this as soon as possible. Without a filled out and approved tax form, you will not be able to withdraw money, even if it has already been credited to your internal balance. This is a separate mandatory step after identity confirmation.
6. What does the error «Photo already in use» mean?
This error means that the security system has detected that the documents you uploaded have already been used to verify another OnlyFans account. If this is your old/blocked account — restore access to it. If not — your data may have been compromised. You should immediately contact support to resolve this issue.
7. The application was approved, but the functions for creating paid content did not open. What to do?
Try logging out of your account and logging back in, as well as clearing your browser cache or reinstalling the app. If that doesn’t help, a technical error likely occurred. Write to support, attaching a screenshot of the email about successful verification.
Want to promote your OnlyFans profile?
Start getting paying subscribers from search. Launch in 48 hours.
Recent partner average: $4.24 back per $1 • 324% ROMI
ONLY FOR ONLYFANS AGENCIES, MODELS, AND MARKETERS
Want to promote your OnlyFans profile?
Start getting paying subscribers from search. Launch in 48 hours.
Recent partner average: $4.24 back per $1 • 324% ROMI